

Connect the Flipdish MCP Server to Claude
The Flipdish MCP server lets AI assistants like Claude work directly with your Flipdish account. Once connected, you can ask in plain language to check sales channels, review properties and menus, update opening hours, and more. The assistant calls Flipdish on your behalf using your own account permissions.
This guide walks you through setup for the most common clients.
Before you start
You will need:
- A Flipdish Portal or App account. MCP access is available to Portal and App users only. You sign in with your normal Flipdish credentials during setup.
- A supported client such as Claude (Desktop, web, or Team/Enterprise)
- The MCP endpoint URL:
https://mcp.flipdish.com/mcp
How authentication worksYou sign in to your own Flipdish account through your AI client. The client holds your session token. The MCP server does not store credentials or state of its own. It passes your token through to the Flipdish API, and your existing role-based permissions are enforced. You only ever see the data and actions your Flipdish account already allows.
Connect from Claude
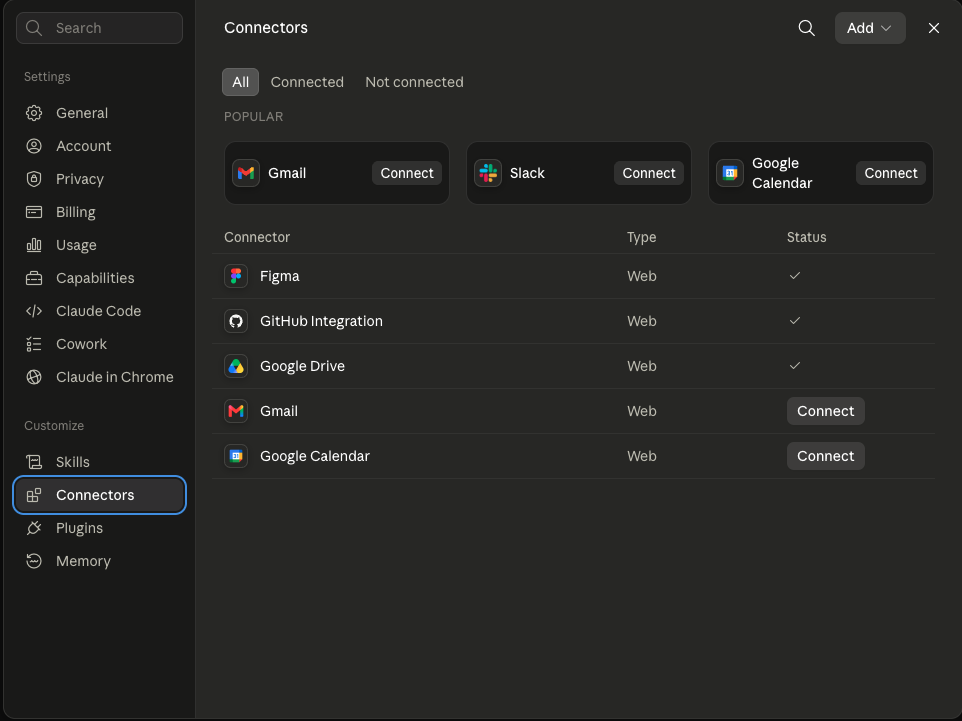
1. Open Connectors settings
- Open Claude (desktop or web).
- Go to Settings → Connectors.
- Desktop: Settings → Connectors
- Web: profile menu → Settings → Connectors
2. Add a custom connector
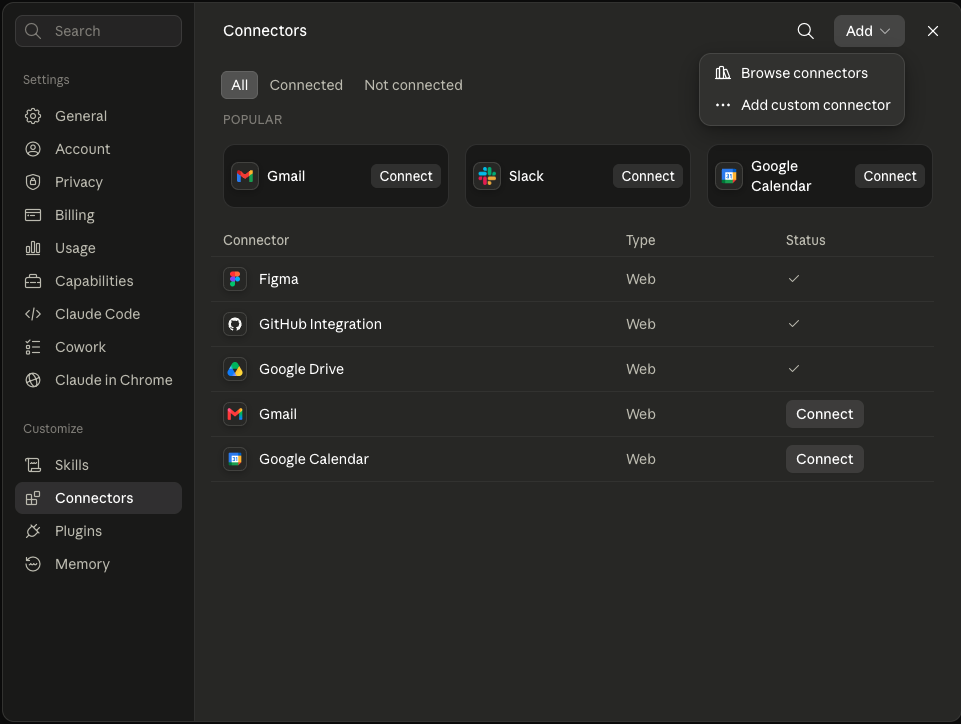
- Click Add in the top right.
- Choose Add custom connector.
3. Enter the Flipdish MCP details
- Name:
Flipdish(or any label you prefer) - URL:
https://mcp.flipdish.com/mcp - Click Add.
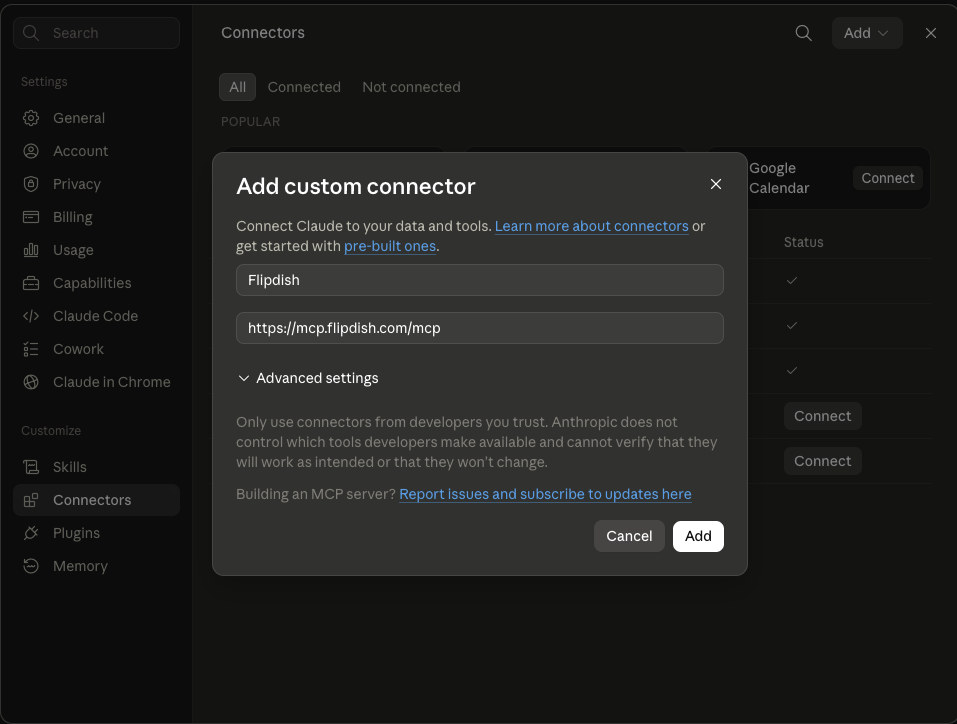
Claude will detect that the server requires OAuth.
4. Connect and sign in
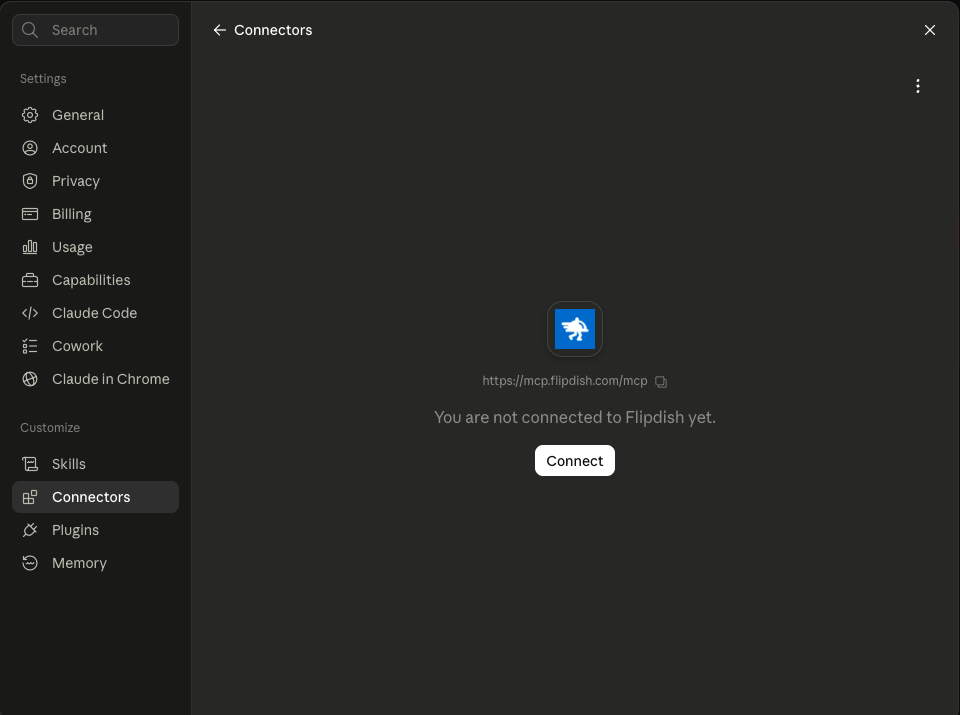
- Open the Flipdish connector. You should see that you are not connected yet.
- Click Connect.
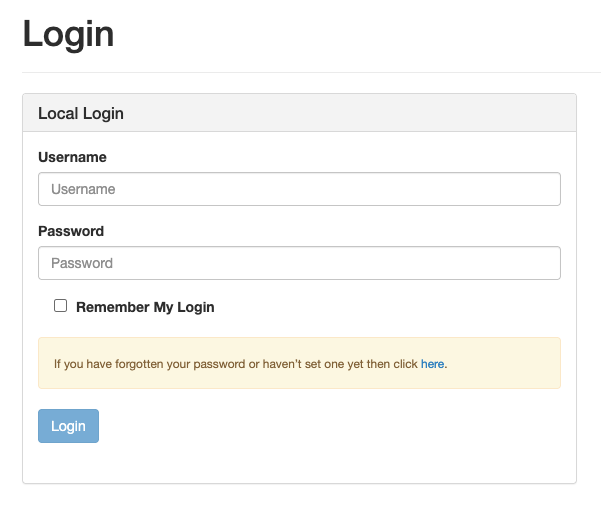
- A Flipdish sign-in window opens in your browser.
- Sign in with your Flipdish Portal or App username and password.
5. Grant permissions
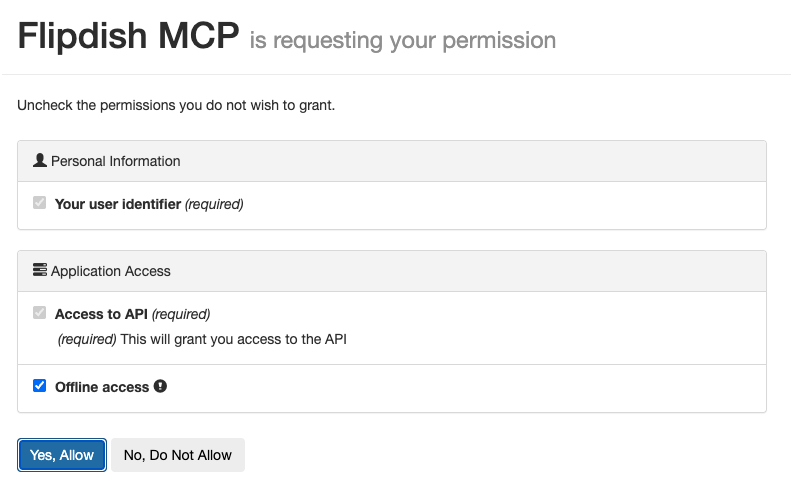
- Review the permission request from Flipdish MCP.
- Required scopes (cannot be unchecked):
- Your user identifier
- Access to API
- Optional:
- Offline access (recommended so the connection stays usable without re-auth every session)
- Click Yes, Allow.
You will be returned to Claude with the connector showing as connected.
6. Review tool permissions (optional)
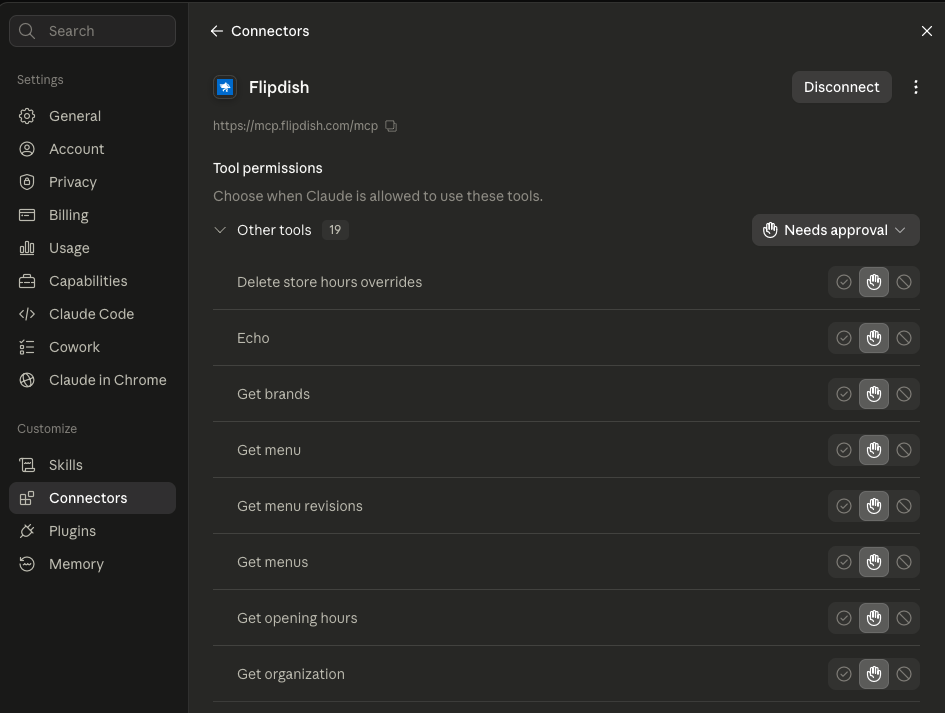
After connecting, open the Flipdish connector to review Tool permissions. You can choose whether Claude must ask before using each tool (Needs approval), always allow, or disable specific tools.
7. Confirm it works
Start a new chat and try something simple, for example:
- "List my Flipdish orgs."
- "Show my sales channels."
- "What are the opening hours for property X?"
Claude will prompt you to allow the tool the first time it is used (unless you already set tools to always allow).
What you can do once connected
Once connected, your assistant can call Flipdish tools on your behalf. The exact tool list grows over time. Common capabilities include:
| Area | Examples |
|---|---|
| Orgs & brands | List orgs, view org details, get brands |
| Apps & sales channels | See apps and sales channels, retrieve property details |
| Sales channels | List or browse sales channels across web, app, kiosk, and delivery |
| Menus | Open published menus, get menus / menu revisions, find menu items, snooze menu items |
| Opening hours | Check opening hours, set property hours, update standard hours, apply or delete temporary overrides |
Example prompts
Try these after connecting:
- "Which orgs can I access?"
- "List sales channels for [brand or sales channel]."
- "What are today's opening hours for [property]?"
- "Close [property] tomorrow for a bank holiday."
- "Snooze [menu item] until this evening."
- "Show me the published menu for [sales channel]."
Need help?
If you get stuck, reach out to the Flipdish team and we will help you get connected.
Updated 21 days ago